Internationalizing a React Native App with i18next and Expo: Part 1
Seamlessly Bridging Language Gaps: Implementing i18next in Your React Native Expo App for Global Reach

I'm a developer who grew up in Houston, TX. I've done a lot of things in my life and have finally found that software and development is truly what makes me happy.
I've been a musician, a teacher, a flight attendant, and airline pilot, and now a full stack software engineer.
I get to learn about new tech every day. And I'm here to share it all with you.
I've been working with React Native and Expo for a little over a year now and I love it. I started my cross-platform mobile development journey with Flutter back when it was just a baby in 2017. But, being a primarily React developer, it just made sense for me to make the switch to React Native.
Up until a few weeks before the writing of this article, I had only ever worked in code bases where the internationalization work had already been completed. I had never actually implemented i18n in an application. Be it web or mobile.
So, let's take a look at how I internationalized Hundred Habits, my habit tracker app based on the Law of 100 principle.
Install the packages
First, you'll want to install the necessary i18n packages we'll work with. I use Expo for my React Native projects, so we'll use the npx expo install command to install what we need.
i18next and react-i18next are internationalization frameworks. We will use methods and hooks from these frameworks to interpolate translation "keys" into localized / translated text.
expo-localization is provided by Expo and will give us access to our device's system locale settings.
npx expo install i18next react-i18next expo-localization
Set up the necessary files
I typically have a services folder inside of my project for "services". I consider i18n a service. Create a folder called i18n. This will hold our translation JSON files.
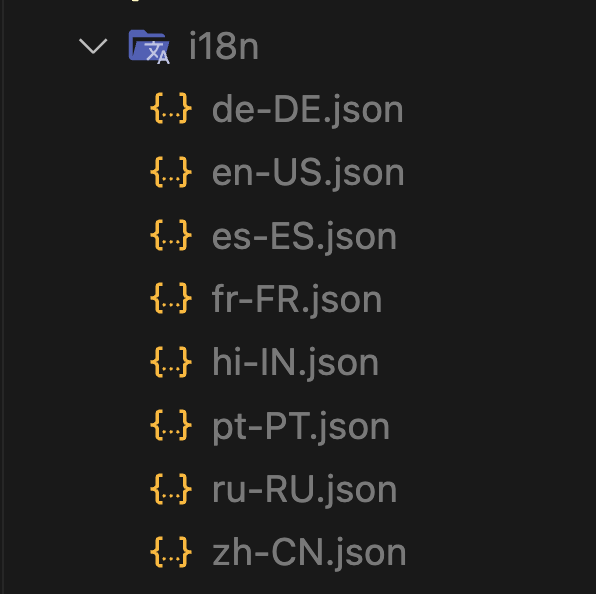
We'll talk about what these files look like a little later.
Initialize your i18n instance
I use expo-router so I have a root _layout file in the app folder of my project. Within the root _layout file, you'll want to set up a useEffect to initiate your i18n instance. I also chose to create a state variable to track what we have initialized so that we don't unnecessarily fire the initialization multiple times.
// _layout.tsx

import { useState } from 'react'
import i18n from 'i18next'
import * as Localization from 'expo-localization'

import en from '@/services/i18n/en-US.json';
import pt from '@/services/i18n/pt-PT.json';
import ru from '@/services/i18n/ru-RU.json';
import zh from '@/services/i18n/zh-CN.json';
import es from '@/services/i18n/es-ES.json';
import fr from '@/services/i18n/fr-FR.json';
import de from '@/services/i18n/de-DE.json';
import hi from '@/services/i18n/hi-IN.json';

export default function RootLayout() {

// Our imported language resources
 const resources = {
    en,
    pt,
    ru,
    zh,
    de,
    es,
    fr,
    hi,
};

// State to track if we've initialized i18n
const [ languageLoaded, setLanguageLoaded ] = useState(false)
// Our language (locale) to use
const [ language, setLanguage ] = useState<string | null>()

// ....other code

useEffect(() => {
    // We either don't have a language or we've already initialized
    if (!language) return;
    i18n.use(initReactI18next).init({
      compatibilityJSON: 'v3',
      resources,
      lng: language,
      fallbackLng: 'en',
    });
    setLanguageLoaded(true);
  }, [language, languageLoaded]);

// ...other code
}
Set up your language JSON files
Each of the language JSON files will contain a JSON object of a unique translation key, and the value will be the translated text that the key represents.
US English file: en-US.json
{
"translation": {
    "yes": "Yes",
    "no": "No",
    "addAGoal": "Add a goal",
    "createGoal": "Create goal",
    "editGoal": "Edit goal",
    "deleteGoal": "Delete goal",
    "goal_one": "Goal",
    "goal_other": "Goals",
    "title": "Title",
    "back": "Back"
}
Portuguese file: pt-PT.json
{
  "translation": {
    "yes": "Sim",
    "no": "Não",
    "addAGoal": "Adicionar um objetivo",
    "createGoal": "Criar objetivo",
    "editGoal": "Editar objetivo",
    "deleteGoal": "Excluir objetivo",
    "goal_one": "Objetivo",
    "goal_other": "Objetivos",
    "title": "Título",
    "back": "Voltar"
}
Get your device's system locale on app load
You may have noticed we had language and setLanguage variables in our _layout. Let's create another useEffect and set our language that needs to be passed into our i18next initialization.
// _layout.tsx

import { useState } from 'react'
import i18n from 'i18next'
import * as Localization from 'expo-localization'

import en from '@/services/i18n/en-US.json';
import pt from '@/services/i18n/pt-PT.json';
import ru from '@/services/i18n/ru-RU.json';
import zh from '@/services/i18n/zh-CN.json';
import es from '@/services/i18n/es-ES.json';
import fr from '@/services/i18n/fr-FR.json';
import de from '@/services/i18n/de-DE.json';
import hi from '@/services/i18n/hi-IN.json';

export default function RootLayout() {

    // Our imported language resources
     const resources = {
        en,
        pt,
        ru,
        zh,
        de,
        es,
        fr,
        hi,
    };

    // State to track if we've initialized i18n
    const [ languageLoaded, setLanguageLoaded ] = useState(false)
    // Our language (locale) to use
    const [ language, setLanguage ] = useState<string | null>()

    // ....other code

    useEffect(() => {
        // We either don't have a language, or we've already initialized
        if (!language || languageLoaded) return;
        i18n.use(initReactI18next).init({
          compatibilityJSON: 'v3',
          resources,
          lng: language,
          fallbackLng: 'en',
        });
        setLanguageLoaded(true);
    }, [language, languageLoaded]);

    useEffect(() => {
        // I realize we don't need this to be async, but I'll get to why in another article.
        const getSystemLanguageAndSet = async () => {
            // Get the device's current system locale from expo-localization
            const phoneLocale = Localization.getLocales()?.[0]?.languageTag ?? 'en-US';
            setLanguage(phoneLocale);
        };

        getSystemLanguageAndSet();
    }, [])

    // ...other code

    // We don't want to load the app until everything is initialized
    // You'll probably be loading other things like fonts and assets too
    if (!languageLoaded) {
        return null
    }

    return <App />
}
Translate the content
To translate our content, we'll use the useTranslation hook provided by react-i18next.
Here's a simple component that uses the hook and the t method to translate a key.
import React from 'react';
import { StyleSheet, Text, View } from 'react-native';
import { useTranslation } from 'react-i18next';

export default function SimpleExample = () => {
  const { t } = useTranslation();
  return (
    <View style={styles.main}>
      <Text>{t('hello')}</Text>
    </View>
  );
};

const styles = StyleSheet.create({
  main: {
    width: 356,
    top: 123,
    bottom: 342,
    backgroundColor: 'red',
  },
});
Here, you can see the key 'hello' being used as the argument in the t method. Based on what locale your device is set to, i18next will look in the appropriate JSON file, find the key 'hello', and display the appropriate localized / translated value for that key.
Android caveat
For iOS, the app reloads when the system locale is changed. This isn't true for Android. So, for Android, you'll need to listen for changes to the AppState and manually change the language with i18next.
Add the following useEffect to you root _layout . Don't forget to import AppState and Platform from 'react-native.
 useEffect(() => {
    // We don't care about iOS for this.
    if (Platform.OS !== 'android') return;

    // Any time the app state changes, get the new locale and set it.
    const _handleAppStateChange = async () => {
      i18n.changeLanguage(
        Localization.getLocales()?.[0]?.languageTag) ?? 'en-US'
      );
    };

    const subscription = AppState.addEventListener(
      'change',
      _handleAppStateChange
    );

    return () => {
      subscription.remove();
    };
  }, []);
Notice we use the i18n.changeLanguage method to change the language that our i18n instance has stored. We'll leverage this method in a future article where we change the language within the app instead of only relying on the system locale settings.
That's all for now!
Join me in a part 2 where we use AsyncStorage to set our language outside of our system locale settings.
Thanks for reading! Cheers.